LOGIN
  • Post to the EFV-8 Forum
  • Post Classified Ads
  • Shop the Online Store
User Login

Not Registered Yet? Click Here to Sign Up!


(Forgot your Password?)
Remember me on this computer

Not registered yet?
REGISTER NOW!

Back to Home Page Show Forum Rules

Early Ford V-8 Club Forum

FORUM RULES: Users agree to these Rules when using Forum.

The site administrator reserves the right to change the terms and conditions of the user agreement without prior notice to the user. It is the responsibility of the user to regularly review the terms of this agreement.

The user agrees to the following terms:

  1. All information that you provide to us for your membership is correct.
  2. You will not use your membership to spam, harrass, or exploit other members in any way.
  3. Vulgar, Abusive, Racist and Sexist Language will not be tolerated.
  4. Commercial-type sales postings will not be allowed.
  5. No mass posting or flooding of the boards is allowed.
  6. No Advertising of parts or cars; no Ebay or business/commercial ads (please use the "Classified" for ads Wanted or For Sale).
  7. VIEWING MULTIPLE TOPICS ON SCREEN: You can choose to see more than 10 Topics at a time ... Log In and choose "Preferences" from the top bar on the Forum page. Scroll down and Change the "Default Topics Returned" parameter to 25 or 50, and save the changes. Since this setting is stored in your browser 'cookies' (if enabled), it seems to use that stored value even if you are not logged in. So, if you use a PC that you haven't logged into the forum from, the setting still seem to remain at the default.
  8. EXTERNAL PHOTO LINKS ON FORUM: You can still use external photo links in your posts on the new forum. They follow the rules of any link in that they have to have the URL link qualified down to the full image file name (example: .jpg). The links will open in a new browser window, the same as an uploaded image attached to a post. Since an image attachment to any post does not display inline with the post, the results are the same. You can use multiple external links within a post. This link is from photos on a site from Don Clink's 'Deuce@75' albums:

    http://donclink.com/deuce_75_1/images/dscn2950.jpg

    Using links from photo sites such as Photobucket can help in "size" issue with uploaded attachment files. For best viewing in web browsers, photos should be around the 800x600 pixel range, and probably not more than 1024x768. Most cameras today store HUGE jpg image files, as the default settings are in the 7, 8, 10, and 12Mb image sizes. The image files that are then attached are very large, and the browser can't display the full image size without using the scroll bars. Use the re-sizing functions of your photo editing software to reduce the image to 800x600, which reduces the file sixe and the image load time in the browser. Don uses Google's free Picassa3 software, which is an excellent photo management product. All of the photo albums of the Deuce, Grand National, and Auburn that are links on the NORG site were built using Picassa's web creation functions. And it's free? (THANKS to Don Clink for the info!)
  9. HOW DO I SHOW MY EMAIL ADDRESS ALONG WITH MY USERNAME? You can LogIn on the Forum, and select PREFERENCES. On this page Members can add optional information such as their City,State, Country; Occupation; Hobbies: list a Homepage; list AOL Instant Messanger Handle; Signature; "Make Email Address viewable to others;" and even change the number of Default Topics shown on a page. WHEN others click on your profile, they will see this information.

EFV-8 Club Forum / General Ford Discussion / Headliner ('39 Ford Deluxe Coupe)

   Reply to this DiscussionReply to Discussion | Start new discussionNew Discussion << previous || next >> 
Posted By Discussion Topic: Headliner ('39 Ford Deluxe Coupe)

Printer-friendly Version  send this discussion to a friend  new posts last

shadeboy
11-19-2022 @ 12:51 PM
Member
Posts: 10
Joined: Oct 2020
          
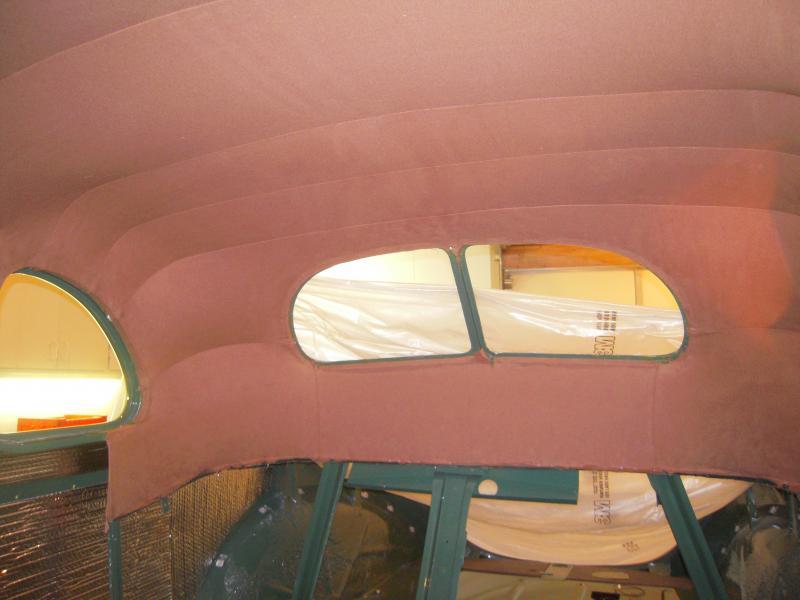
Hi All - I'm getting ready to install a headliner in my '39 coupe. I do have someone helping me that is familiar with installing headliners but he has never done a '39 coupe. When I got the car, the old headliner had already been removed. I have seen some videos regarding installation but never anything that goes from A-Z. At this point, I mostly want to be sure that I have all the pieces needed for a headliner installation. Besides the bow supports, what other pieces are needed? (tack strips, etc.). I would also like to identify the sequence and positions of the bow supports. Any help, links or photos would be greatly appreciated. Thanks.

sarahcecelia
11-19-2022 @ 2:06 PM
Senior
Posts: 1166
Joined: Mar 2013
          
I did one on a 1968 Falcon; You need to put a strip of masking tape on each bow; Start with #1 in the front, then 2,3,4 and so on.Use a plastic tucking tool to tuck it in on the sides if that is the way it was. Try to get it fairly taught front to back; and the side to side; and eliminate any loose places so it is just "Fairly"smooth; if you get it smooth and want it slightly tighter; if it is cloth- you may want to spray it evenly with a LITTLE water to shrink it a little. Ihe Falcon headliner was vinyl and a LITTLE loose; but I just left it alone it for a few days (MAYBE A WEEK) and IT TIGHTENED UP!! (An upholstery pro told me to do that!He said if you have no wrinkles or creases, it will smooth out! He said ,"Don't worry about it!! Just give it some time and it will straighten itself out.") and it did!!And it was perfect!!
.

Regards, Steve Lee

shadeboy
11-21-2022 @ 4:06 PM
Member
Posts: 10
Joined: Oct 2020
          
Steve - I appreciate the installation tips but at this point, I am looking for some insight as to all of the parts needed for a headliner installation on my '39 coupe. I believe the 38-40 coupes are identical in this respect. Besides the headliner itself and the bow supports, there are other parts that are needed. (I believe tack strips and who knows what else). I have some parts with pointy 'fingers' on them that would appear to be for gripping the headliner and may go around one of the windows but I really have no idea where these go, what their purpose is or if there are more (similar) parts that I am missing. Before I launch any effort, I would like to be certain that I have all the needed materials. Any help would be appreciated.

Thanks.

RAK402
11-21-2022 @ 5:01 PM
Member
Posts: 430
Joined: Jul 2015
          
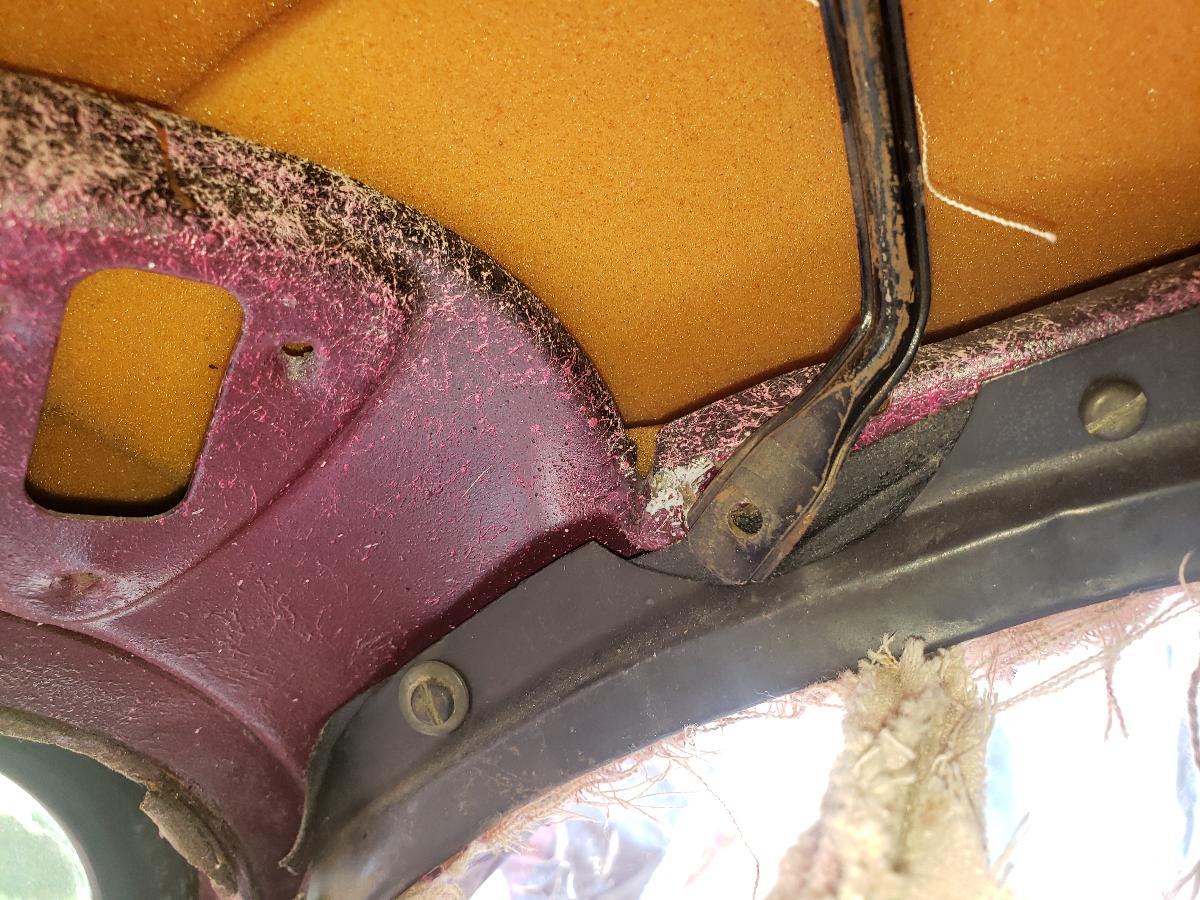
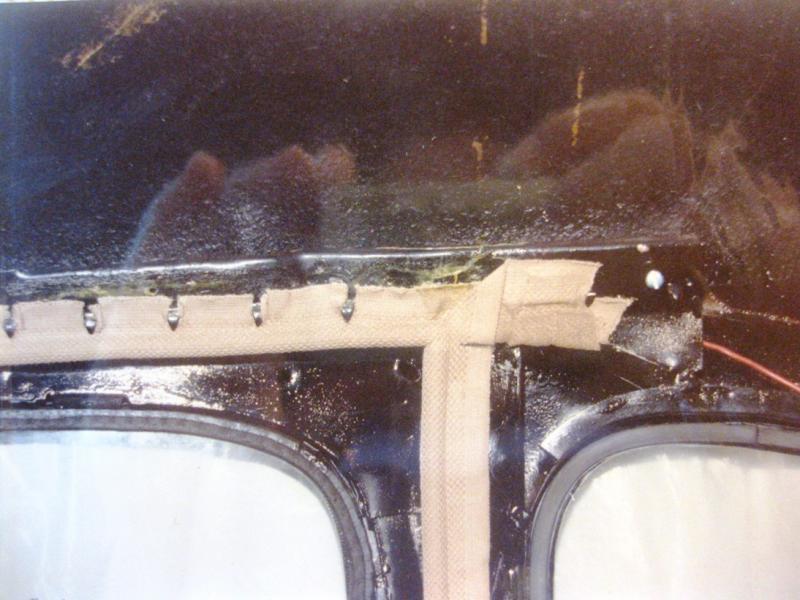
The "pointy fingers" on the body (good name for them) gripping the windlace on my 1940 Fordor Sedan.

On the 40 Fordor the strips are just over the tops of the doors. I suspect this is the same on all 1939/1940 body styles, but this is the only one I have ever worked on.

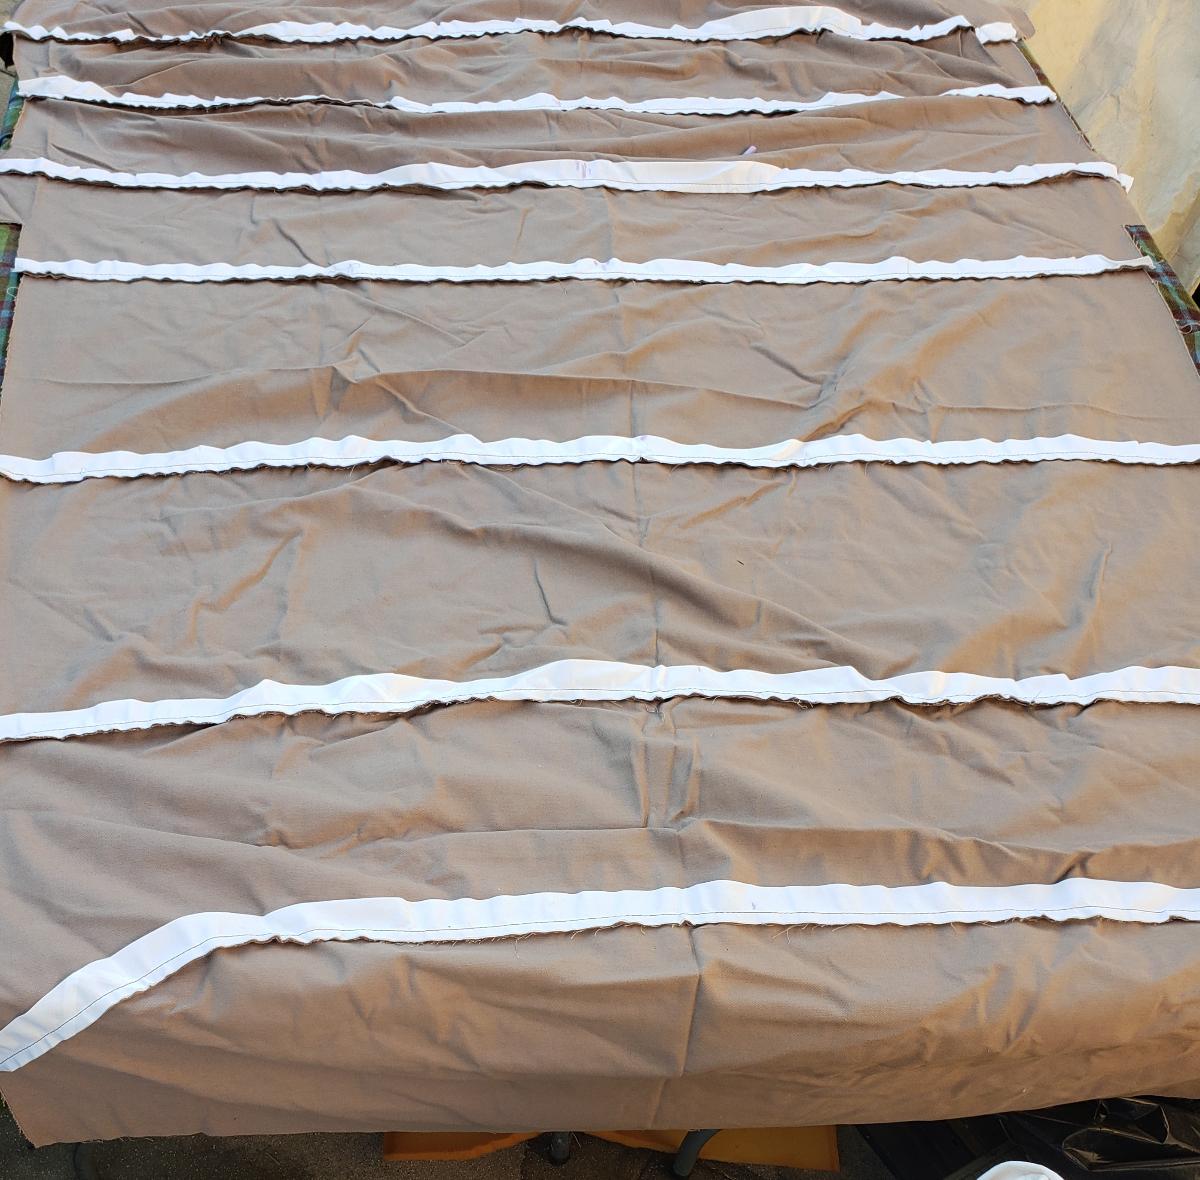
The metal strips go over this after the windlace is installed and the headliner tucks in between the windlace selvage and the strips (which also have the pointy fingers on the back).

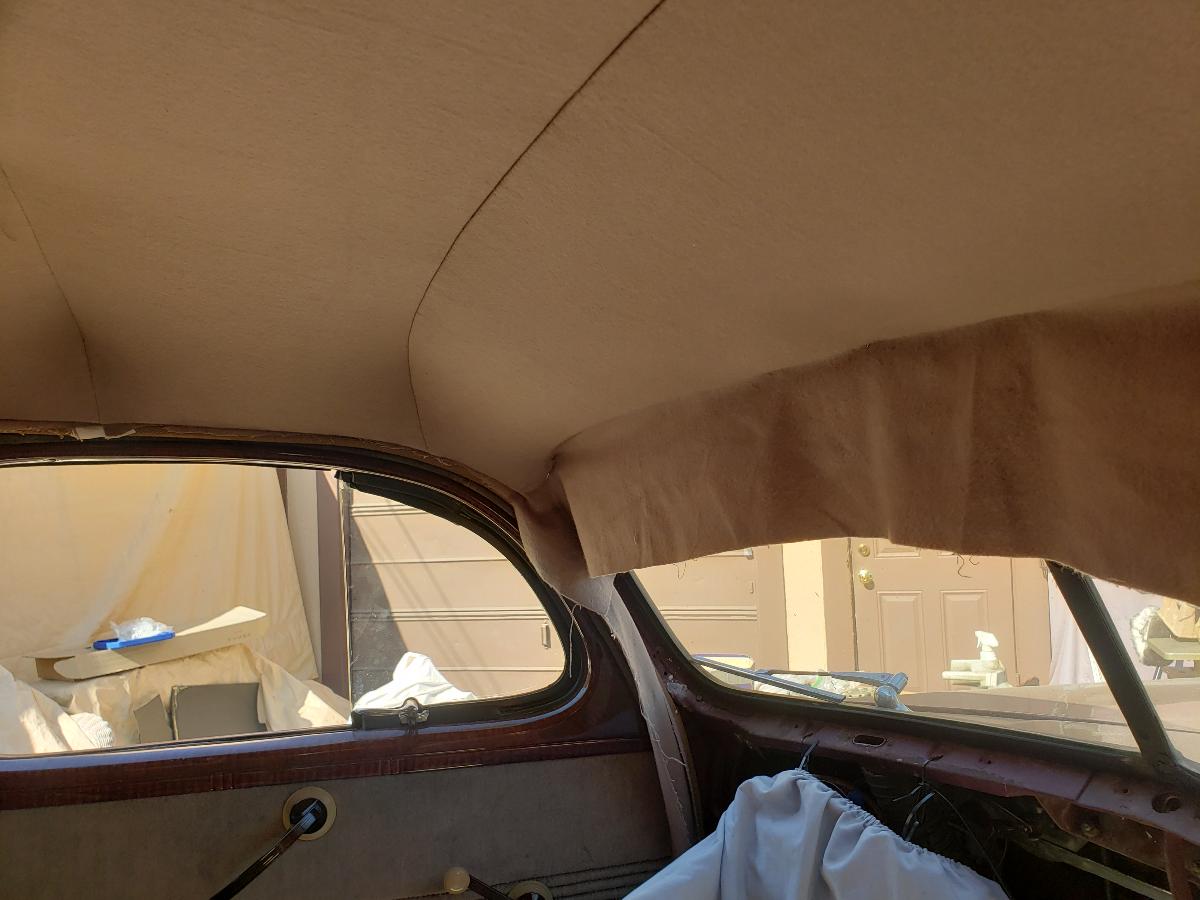
The third photo shows front of the strips in place (before removal and with old foam still in place in ceiling (the foam is not correct, of course).

Make sure the headliner is centered on the bows-What sarahcecelia said about marking the centers of the bows with tape is spot on (you can feel it through the cloth sleeves). Chalk helps to mark the headliner cloth at the center.

There is a hook in the sheetmetal at the front fairly close to the windshield. After all the bows are in, but loose, the sleeve on the first bow should be pierced so that the hook engages the first bow. Then stretch the headliner toward the front and tack/staple it to the tack strip at the center, the move to the rear and do the same.


Work slowly and carefully on the windlace and headliner. This and the front seat back were the most difficult things for me when restoring the interior.

Staples work better than tacks, IMHO, when attaching the headliner to tack strips. On the Fordor contact cement is used to glue the headliner around the rear quarter windows and the rear windows.

Make sure that the headliner fabric is not so tight in front that you cannot install the Sun Visors.

My two cents, having very limited experience with this (and having done it twice now, 46 years apart).

This message was edited by RAK402 on 11-21-22 @ 5:28 PM

cpipp01@aol.com
11-22-2022 @ 4:27 AM
New Member
Posts: 146
Joined: Oct 2009
          
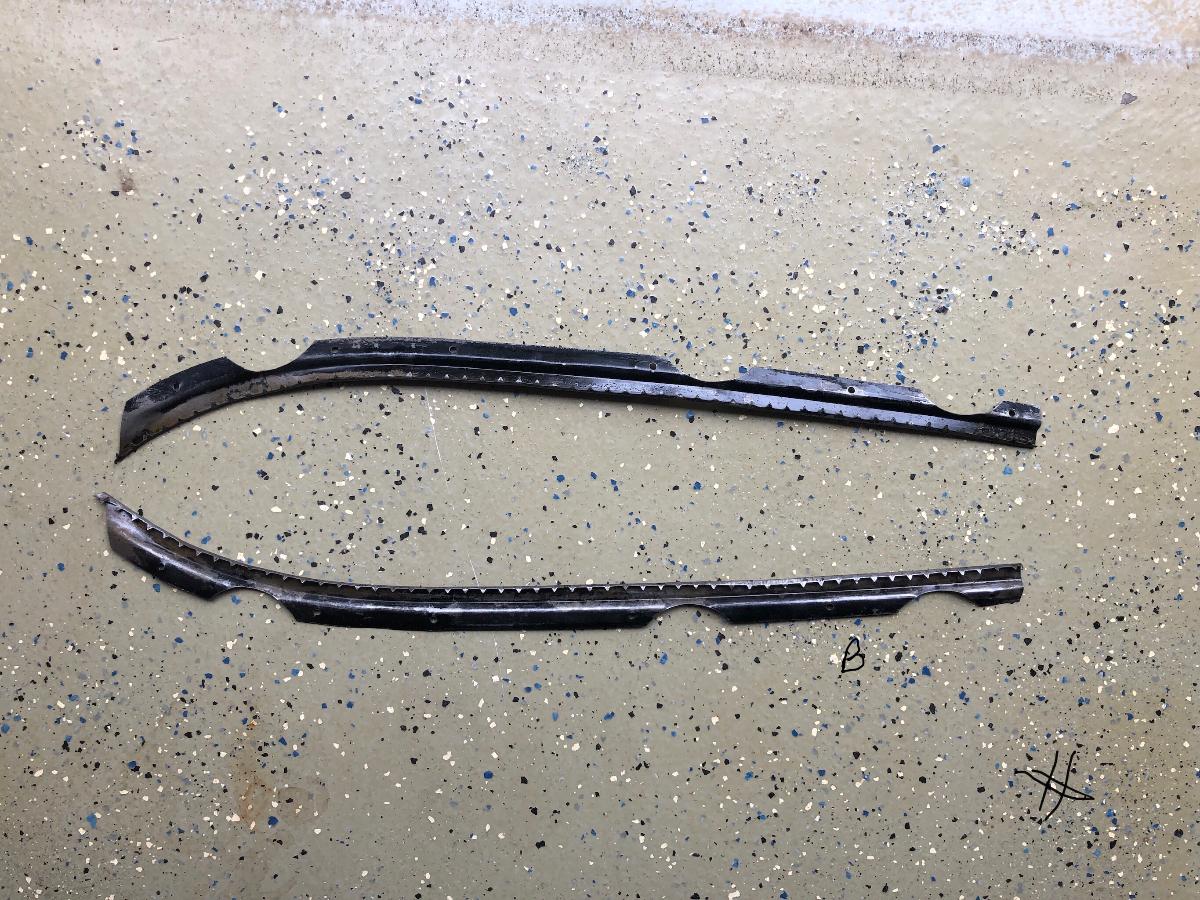
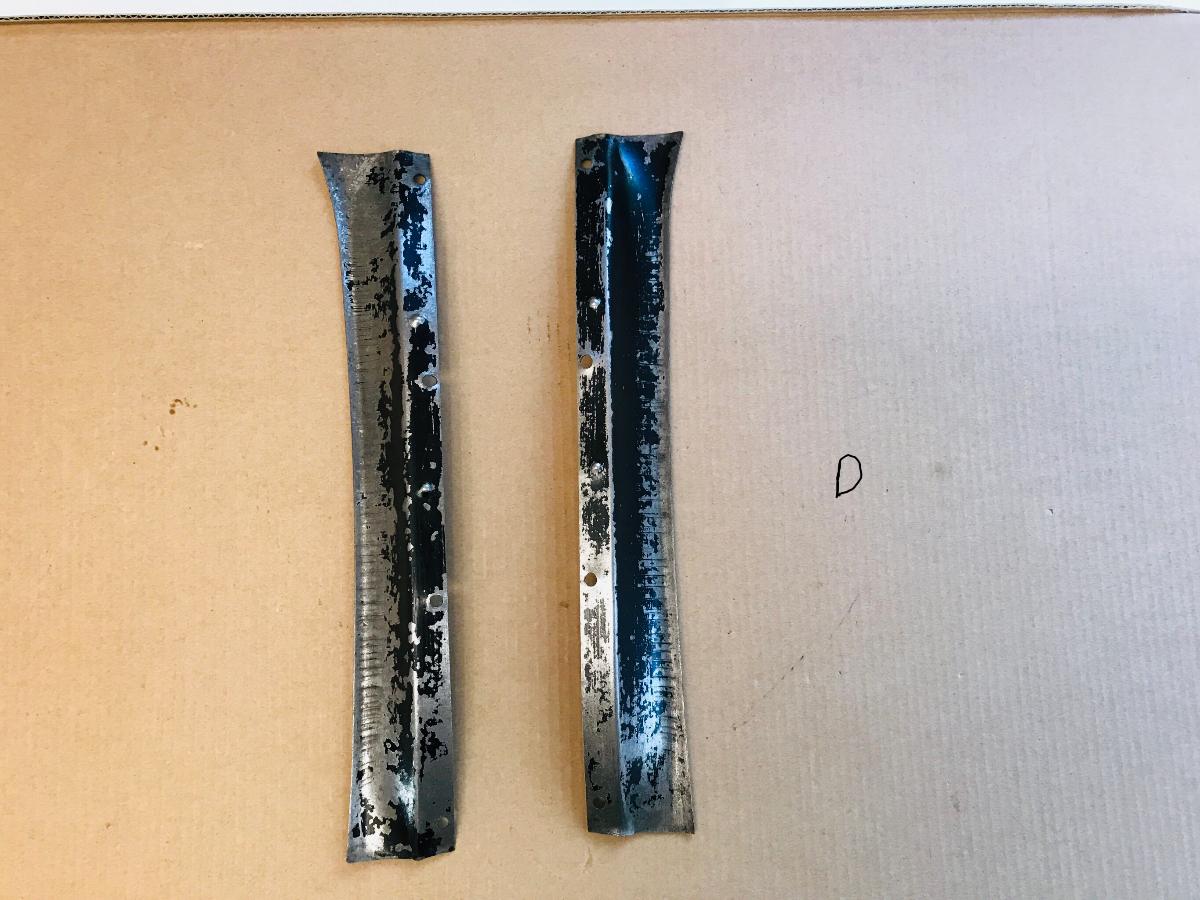
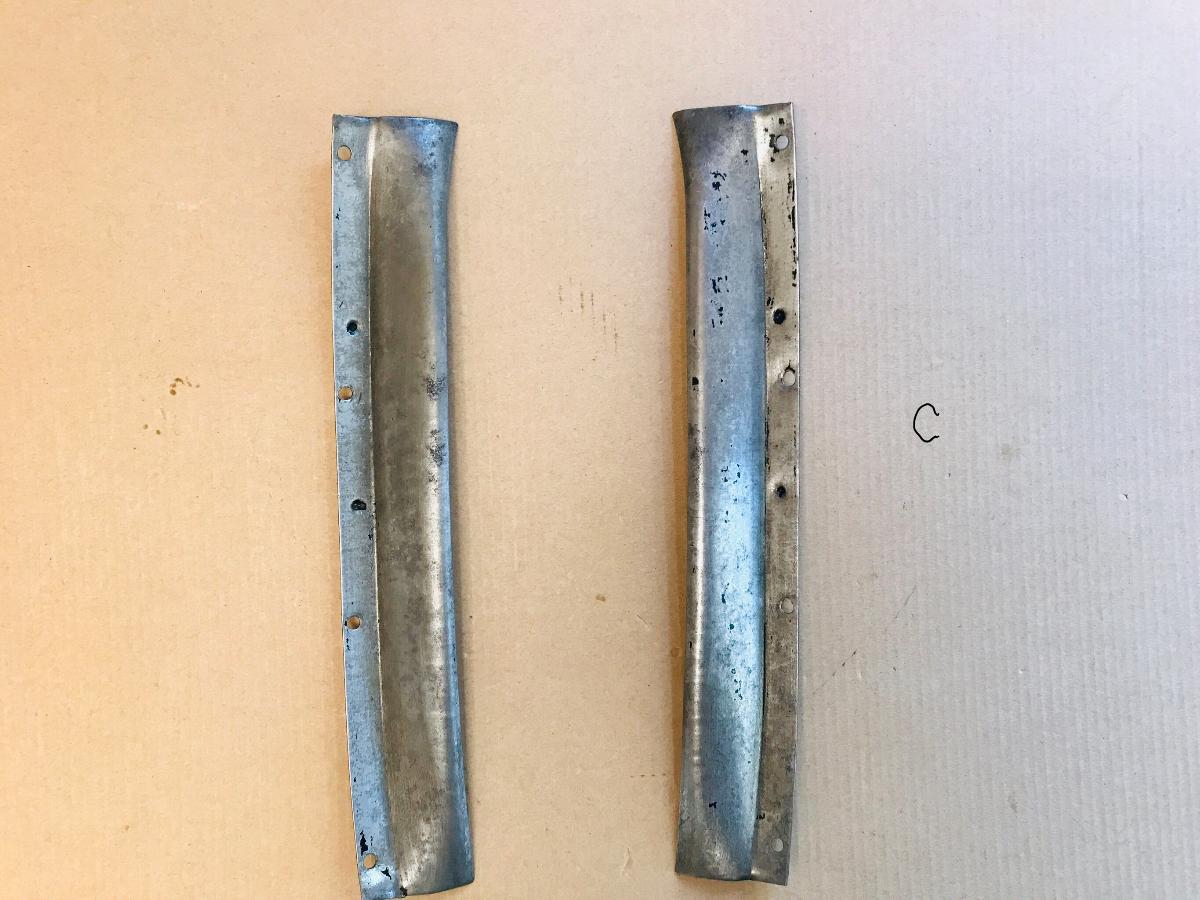
See attached. A & B are the headliner retainers that mount above the door openings. C & D are the moldings that get covered in headliner material and mount on the A pillars before the windshield garnish moldings get installed.

40 Coupe
11-22-2022 @ 4:40 AM
Senior
Posts: 1643
Joined: Oct 2009
          
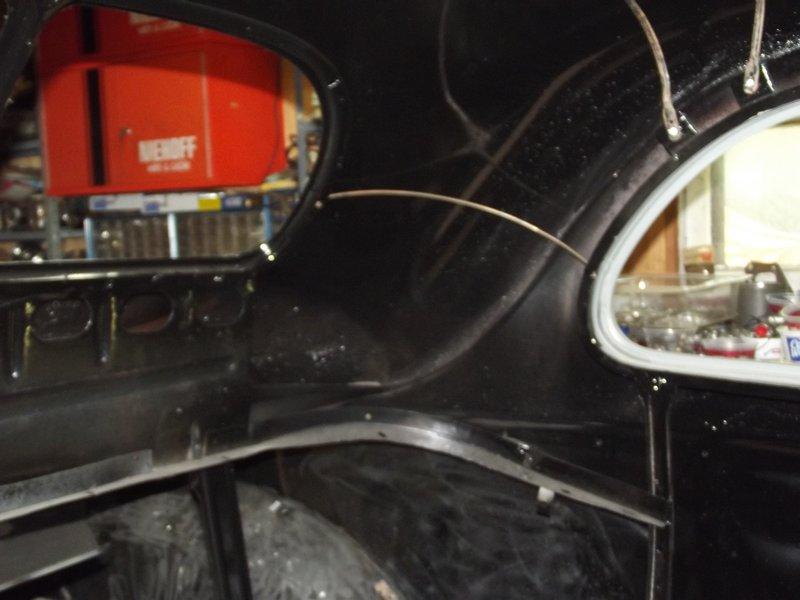
For the 40 there are also round wires that run from the rear of the quarter windows. They help form the area from the rear of the quarter to the rear window. Some of the roof bows may be numbered near their ends with screw holes, but I don't have the sequance. there are two vertical seals in the headliner under the rear window. The photos below are not mine.

This message was edited by 40 Coupe on 11-22-22 @ 4:52 AM

trjford8
11-22-2022 @ 9:06 AM
Senior
Posts: 4200
Joined: Oct 2009
          
In addition to the good advice that has been given I have found that using pop rivets to hold the windlace in place on the cowl panels and above the doors works well. The rivets are all hidden by the cowl panel retainers and when the headliner is tucked in over the doors. Be sure to install all new tack strips in the back of the door jambs , above the front header panel and everywhere else that tack strips are needed. I have found that the tack strip material sold by Drake and other vendors in various thickness works well. Using staples as previously suggested also works well. I use an inexpensive air stapler from Harbor Freight and it has saved time and wear and tear on my old hands. You can also follow along the story by RAK402 which chronicles his installation of his upholstery on his '40.

This message was edited by trjford8 on 11-22-22 @ 9:09 AM

shadeboy
11-22-2022 @ 2:10 PM
Member
Posts: 10
Joined: Oct 2020
          
My Thanks to all. This is the info I was hoping for. Should be tackling this project in the coming weeks. (Makes a good wintertime project).

<< previous || next >> 


NOTE: YOU MUST BE A REGISTERED USER AND BE LOGGED IN TO POST (and reply to) messages in this forum. If you are a first time user, please click the CREATE A NEW ACCOUNT in the masthead above to register and Log In. After that, all you do is LOG IN to enjoy using this site.

DISCLAIMER: The V-8 Club does no independent testing of any of the opinions, thoughts or suggestions presented in the website on the Forum, in the Tech Tips section, or any section. A reader should consider the website to be a forum wherein differing solutions to a particular set of circumstances may be discussed. Ultimately, the selection of an item for an individual's vehicle must be based upon the independent study of the vehicle owner in consultation with people in the hobby and restoration experts.


EFV-8 Club Forum Home | Back to Home Page | Contact the Webmaster

Copyright © 2009 - EFV-8.org
Powered by < CF FORUM > v.2.1