| Posted By |
Discussion Topic:
Gas gauge
-- page:
1
2
|


|
 BIGTERR
 |
 08-07-2019 @ 6:13 AM
|
|
|
|
Member
Posts: 28
Joined: Aug 2012
|
When I fill up my tank on my 47 Merc. the gauge shows full, however after driving around 50 miles it is at half full and then slowly drops as I put more miles on the car. My question , is the gauge at fault or is it the sending unit. I don’t want to change the sending unit if that’s not the problem. Also is there only one wire that comes off the sending unit. Thanks for any help you can give me.
|
 TomO
TomO |
 08-07-2019 @ 6:52 AM
|
|
|
|
Senior
Posts: 7385
Joined: Oct 2009
|
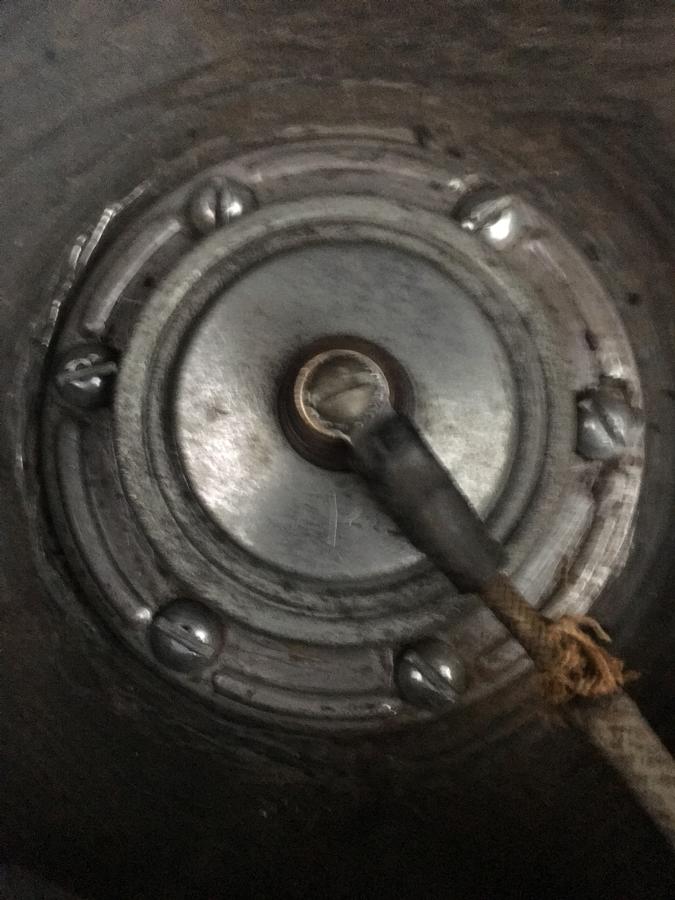
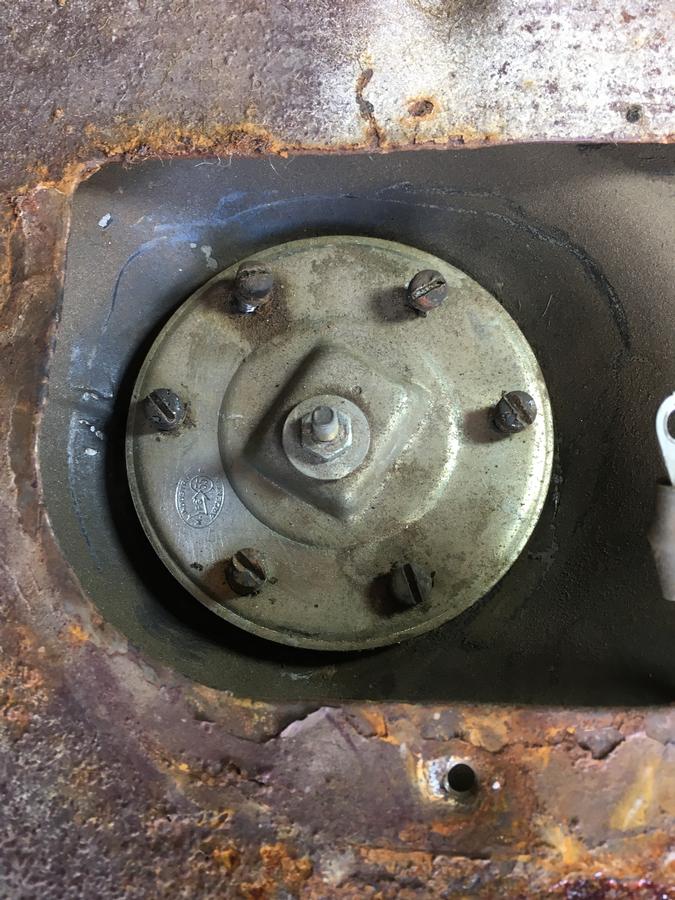
It is most likely the sending unit. Remove the cover over the sending unit in the trunk and look at the top of the sending unit for 6 screws holding the sending unit to the tank and on the top of the sending unit there should be a circle with the letters KS inside. If you have these conditions, your sending unit is an original King Seeley unit and can be repaired.
If you do not have the 6 screws,you have a replacement tank and sending unit. You will have to live with the problem.
If you have the 6 screws and not the KS circle, you can search for a replacement 99A- 9275 sending unit.
The sending unit has one wire that supplies the voltage through the gauge. The grounding of the sending unit is through the screws
Tom
This message was edited by TomO on 8-7-19 @ 6:54 AM
|
 BIGTERR
 |
 08-07-2019 @ 7:58 AM
|
|
|
|
Member
Posts: 28
Joined: Aug 2012
|
Thanks Tom, yes it has 6 screws but no KS on the top. I will look for a replacement as you suggested, I see one in the Drake catalogue with the no. 99A-9275. Thanks for your help.
|
 MG
MG |
 08-07-2019 @ 11:17 AM
|
|
|
|
Senior
Posts: 1301
Joined: Nov 2009
|
Before you buy a new sending unit, remove the one you have and inspect it and its float....
|
 TomO
TomO |
 08-08-2019 @ 7:25 AM
|
|
|
|
Senior
Posts: 7385
Joined: Oct 2009
|
That is an original type sending unit. The aftermarket ones that are inaccurate have a different look. Yours may just have dirty contacts.
The problem is probably dirty contacts in the sending unit. The dash unit reads full and seems to be accurate after a half tank is used, so that rules out the dash unit in my mind.
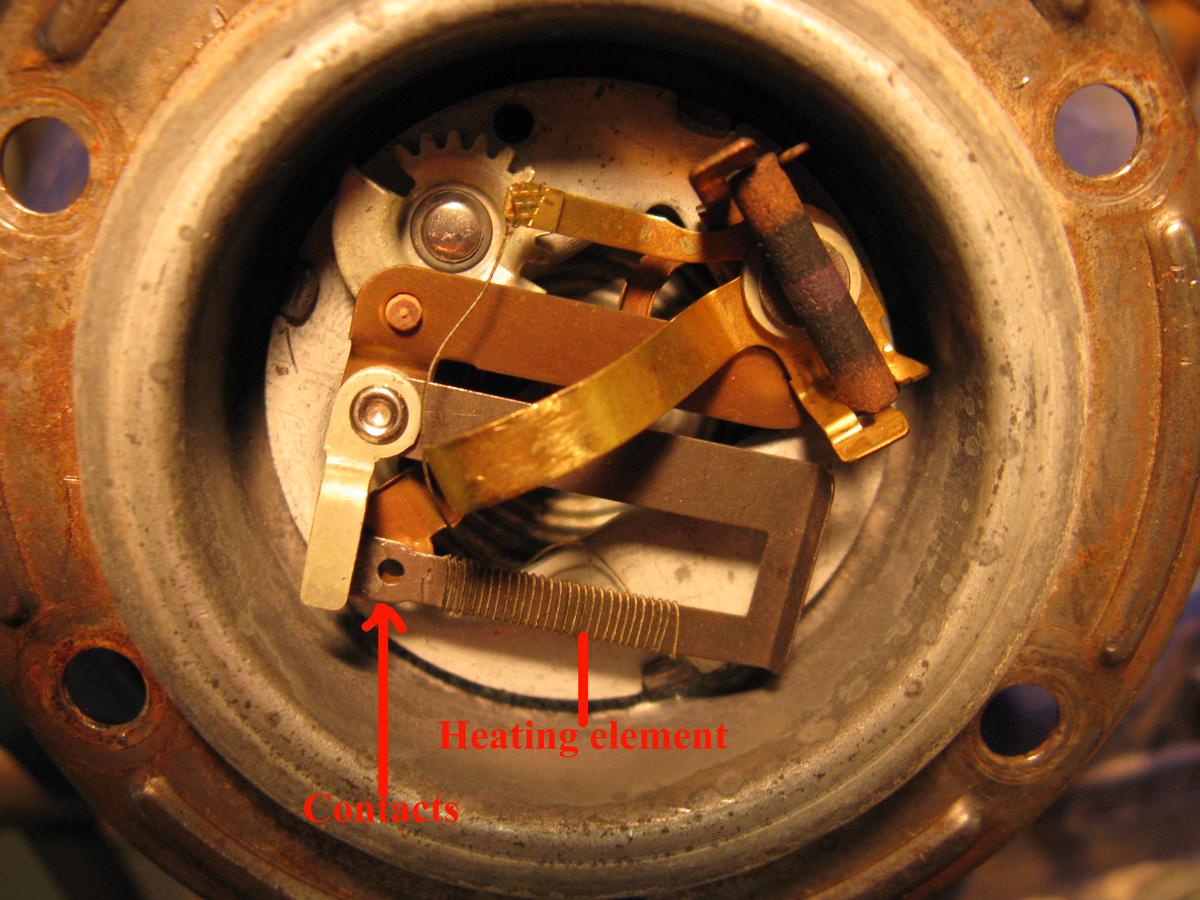
There are 2 methods of cleaning the contacts inside, one is done by removing the sending unit and connecting an ohm meter between the center terminal and the other to the case. Operate the arm many times through its full swing and watch the ohm meter. When the meter shows 0 ohms most of the swing, you can install the sending unit again. It should now work as intended.
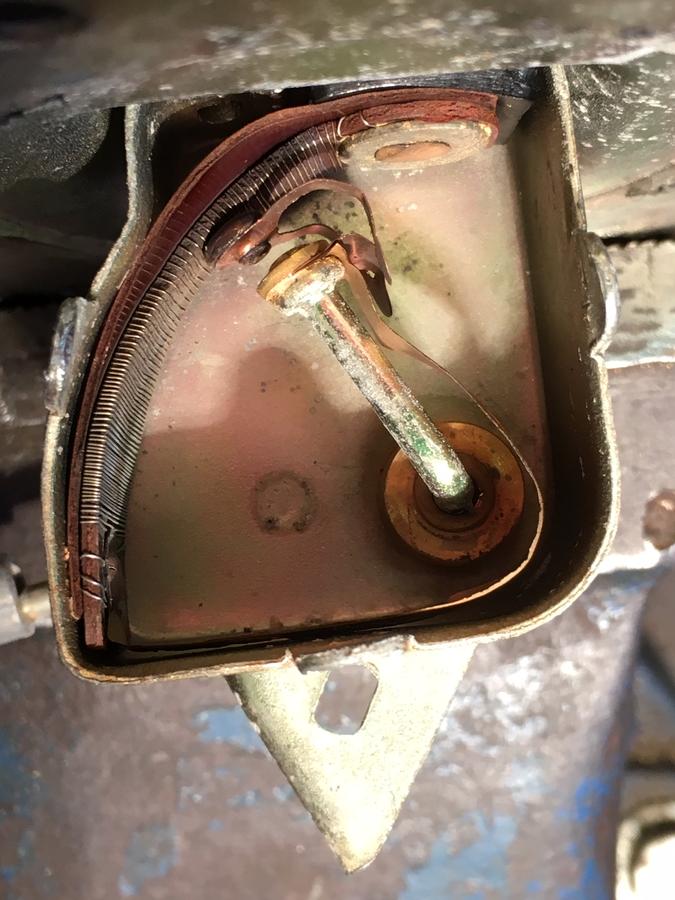
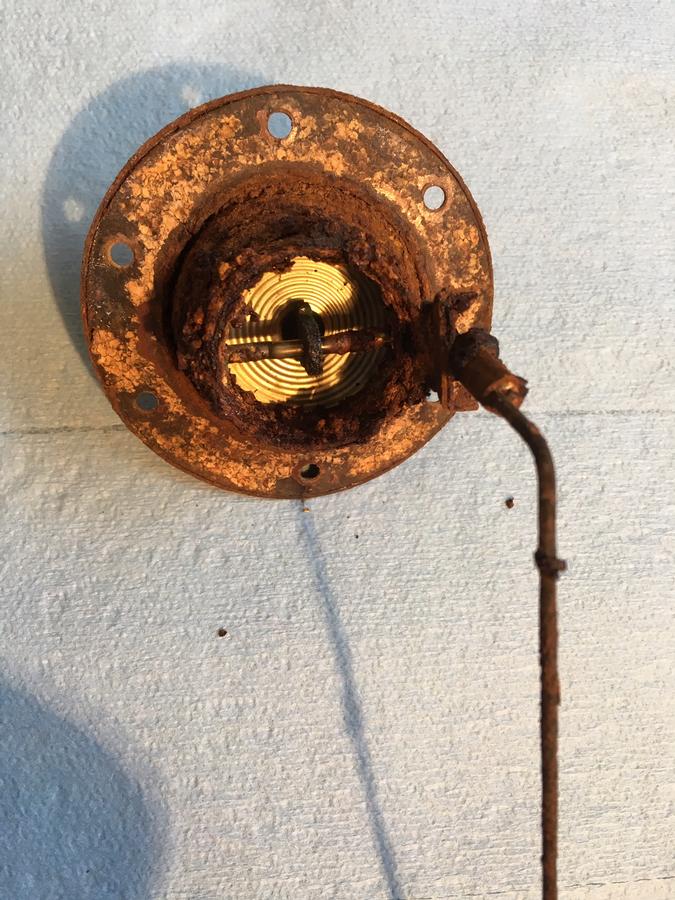
The other method requires a lot of careful handling. Pry the top cober off of the sending unot and be very careful not to break the hair like wires, spray some contact cleaner on the points and operate the arm to clean the contacts. The contacts are silver or silver plated, so an abrasive can damage them. Here is a photo of the inside of the unit.
If neither of these work, connect a jumper wire from the yellow wire on the fuel gauge to the sending unit terminal and another jumper from the case to a good ground. Turn on the ignition switch and move the arm slowly from the empty position to the half and then the 3/4 and then full. Stay at each position for 30 second or more to let the gauge catch up.
If the gauge and sending unit are in sync for the full travel, the float arm may be binding.
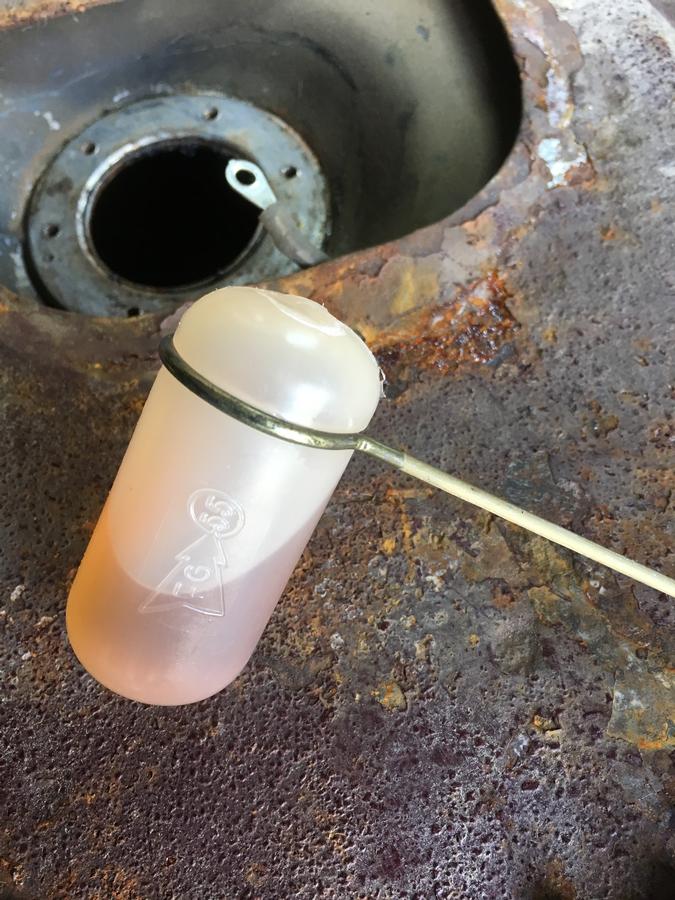
While you have the sending unit out, remove the float, boil some water, remove the water from the heat source and immerse the float in the water. If you see a stream of bubbles, you float is leaking. Replacementfloats should be available or you can just solder the leak, being careful to not melt the solder at the seam.
Tom
|
 51woodie
 |
 08-10-2019 @ 11:23 AM
|
|
|
|
Senior
Posts: 561
Joined: Jan 2017
|
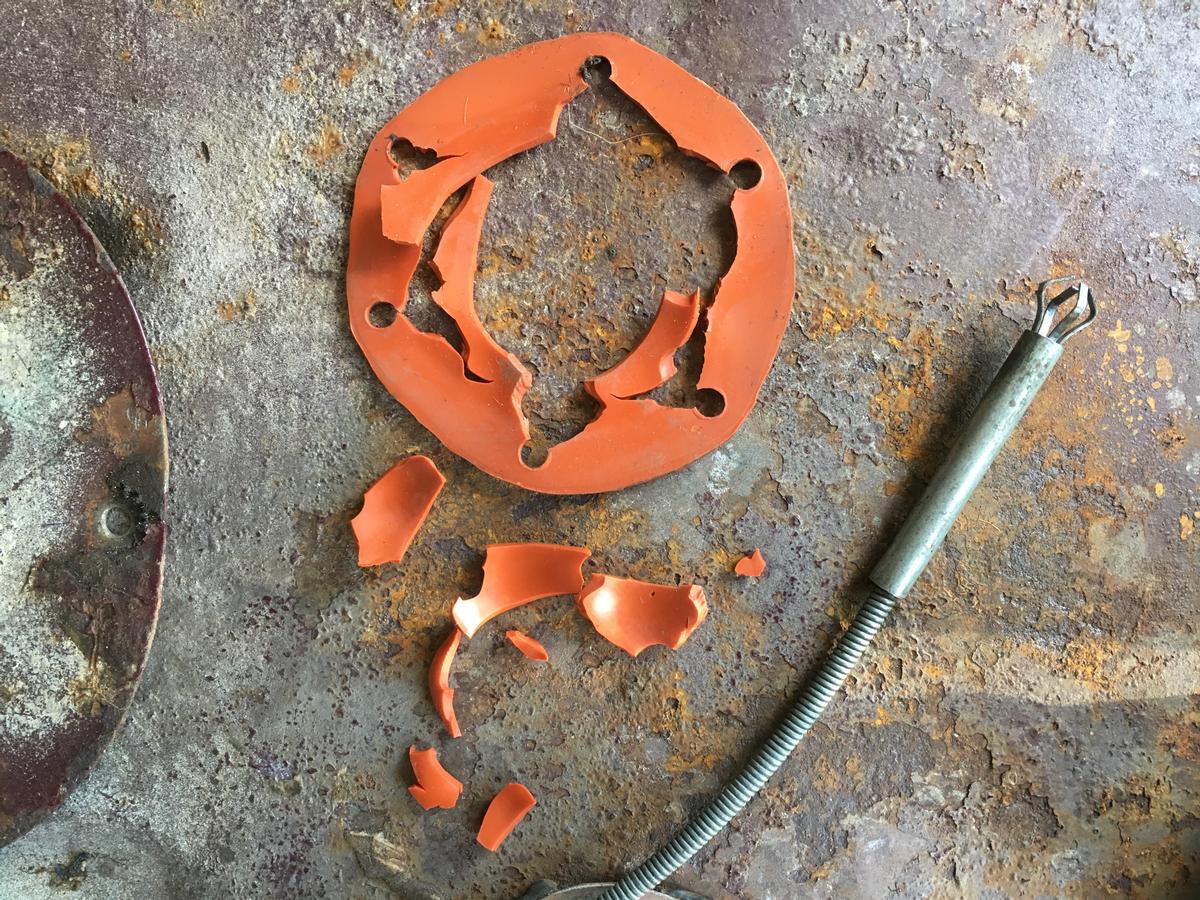
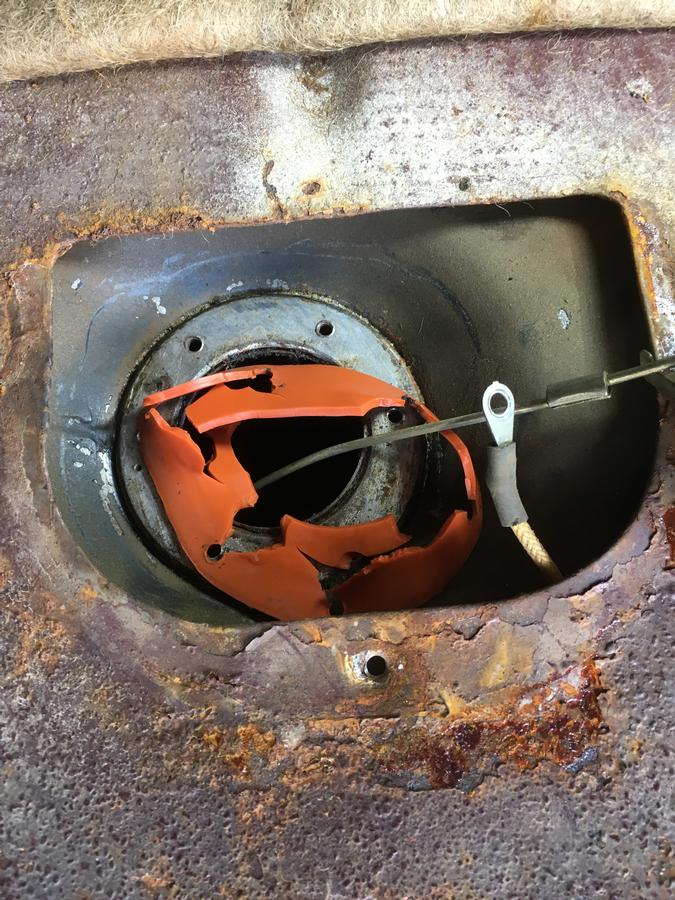
I found that I have a repro sender that was made in Argentina, and installed by a previous owner. I was getting incorrect gauge readings, so investigated by removing the sender. I found: The gasket (supplied with the sender?) was falling apart and some pieces were in the tank. Float arm was too long to give full range of travel, contact arm/spring inside the sender was bent out of place and the float was half full of liquid. I shortened the float rod, drained the float and straightened the contact arm spring. This I consider a temporary repair, so will look for a NOS sender, or a new repro. Does anyone know the ohms readings I should get when the sender is in the empty and full positions? Before reinstalling the sender, I got 105 ohms empty (bottom of travel) and 18 ohms full (top of travel)
|
 TomO
TomO |
 08-12-2019 @ 8:58 AM
|
|
|
|
Senior
Posts: 7385
Joined: Oct 2009
|
I hope that you plan to replace the float. Repairs to the plastic float do not last very long.
The dash unit does not depend on resistance in the sending unit for its readings. To determine if the sending unit matches up with you dash unit, mark 1/4, 1/2 and 3/4 positions on the sending unit and then connect the sending unit to the gauge and move the arm to those positions while you check the reading on the gauge.
NOS KS sending units are very rare and most will require some modification to read accurately in your tank. Try some of the recyclers that handle antique cars. Any unit from 1936 - 1955 Ford, Lincoln or Mercury will work. The truck units will work also, but the arm is very short and must be replaced. The bus units will also work, but the arm must be shortened.
Tom
|
 51woodie
 |
 08-12-2019 @ 11:18 AM
|
|
|
|
Senior
Posts: 561
Joined: Jan 2017
|
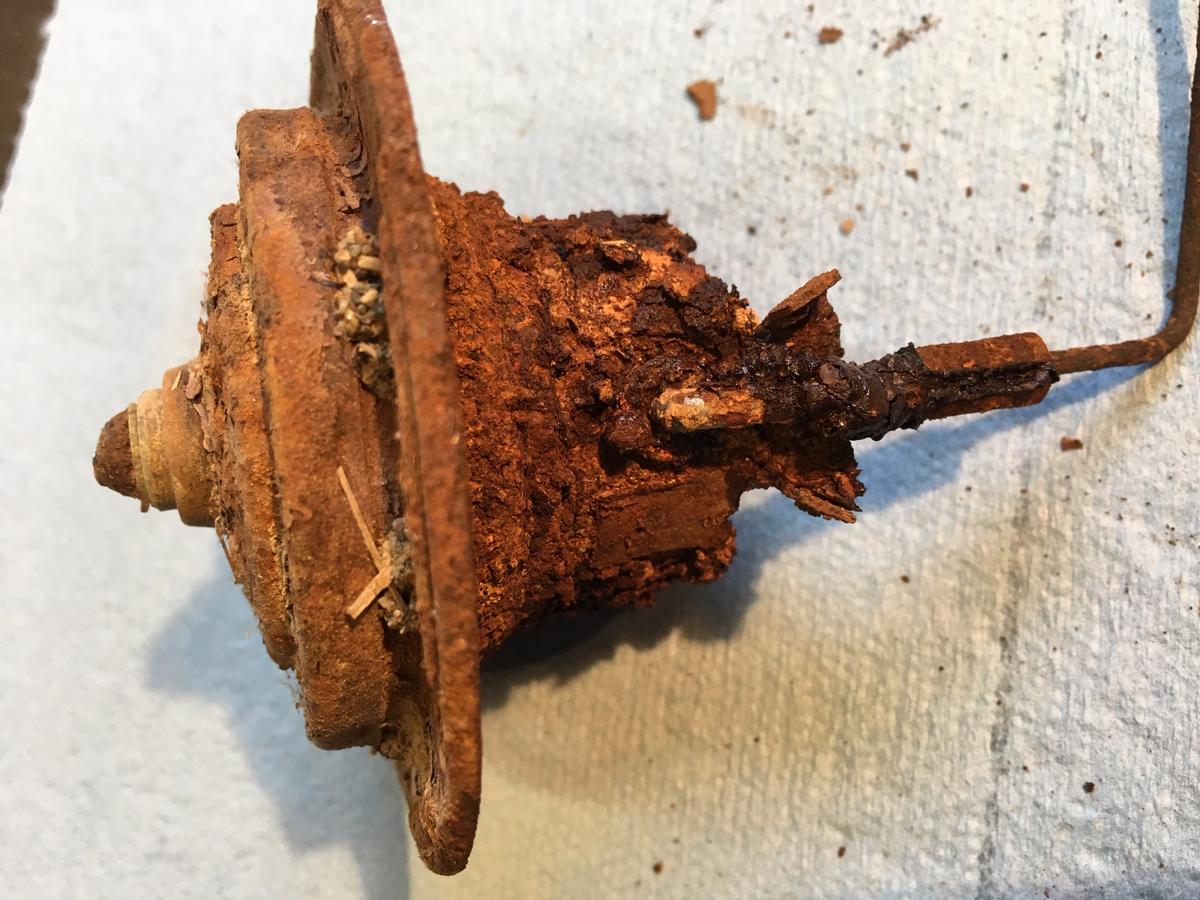
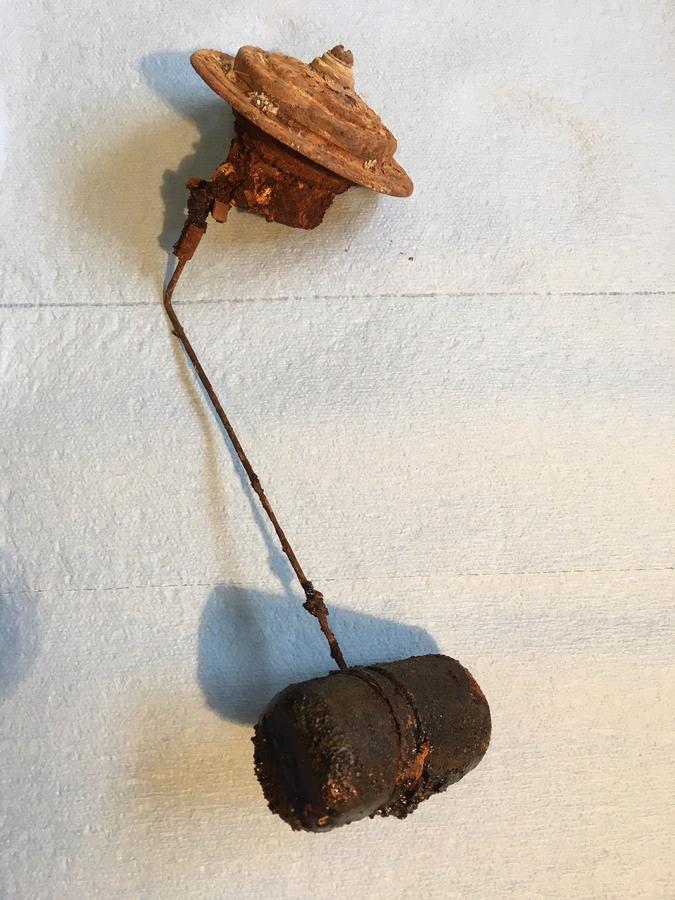
Tom. Thank you for the info. I had a gas tank from a 51 wagon that I pulled the sender out of. It looks ugly, but I will try to revive it. I'll give it a blast with walnut sh*lls (not on the diaphragm) to clean it up. The wire to the float is almost rusted away in places, so needs to be repaired/replaced. Any suggestions to make my efforts successful would be appreciated.
Brian
|
 TomO
TomO |
 08-13-2019 @ 8:12 AM
|
|
|
|
Senior
Posts: 7385
Joined: Oct 2009
|
Brian, clean it up with a good detergent and a brass brush then connect an ohmmeter between the terminal and the sh*ll. Move the arm from empty to full while watching the meter. It should stay near 0 ohms throughout the travel. If it does not show continuity at any point, remove the top cover and look for broken wires and rust inside the unit. Broken wires can be re-soldered, but rust inside around the bellows may mean that it has had it.
Once you have determined that it can be saved, you can finish the cleaning process, protect the body from rust with paint or another sealant, clean the flange where the screws make contact and install it with a new cork gasket.
Tom
|
 sarahcecelia
 |
 10-10-2019 @ 5:27 AM
|
|
|
|
Senior
Posts: 1196
Joined: Mar 2013
|
! have a Bob Drake catalog, 2016-2017, and I can't find that sender# 99A-9275 that you refer to. Can you give me a page # where it is, or is it in a later catalog than mine?
Regards, Steve Lee
This message was edited by sarahcecelia on 10-10-19 @ 5:29 AM
|


 Reply to Discussion


 BIGTERR