| Posted By |
Discussion Topic:
Speedometer
|


|
 BIGTERR
 |
 05-25-2015 @ 10:47 AM
|
|
|
|
Member
Posts: 28
Joined: Aug 2012
|
On my 47 merc the outer and inner portions of the speedo are not lined up. Anyone know how to fix this. They are out about 3/16 of an inch, more so at the 60 mile mark. Thanks
|
|
len47merc |
|
05-25-2015 @ 2:18 PM
|
|
|
|
Senior
Posts: 1165
Joined: Oct 2013
|
BIGTERR - any chance you can post a pic? I believe I know what the issue is but before responding a pic would quickly confirm my suspicions.
Btw - I have a '47 Merc and have been through similar speedo and clock issues so hopefully I can be of help.
Steve
|
|
BIGTERR |
|
05-26-2015 @ 10:26 AM
|
|
|
|
Member
Posts: 28
Joined: Aug 2012
|
Thanks for the reply Steve. Sorry I took so long, my iPad is giving me problems.
|
|
len47merc |
|
05-26-2015 @ 4:10 PM
|
|
|
|
Senior
Posts: 1165
Joined: Oct 2013
|
BIGTERR - now I understand what you are referring to. The fix is simple once you remove the speedometer from the dash. In looking at the picture, the 'brass' background plate with the black and red graduation lines appears to be oriented correctly/proportionately with the '0' and '100' mph red lines looking more even than the numerical white numbers. Also the odometer opening in the brass plate is square with the mileage/odometer reading in the speedo. By doing the 'Ford twist' and contorting yourself into a human pretzel you should be able to remove all electrical (light) and mechanical (speedo cable) connections from the rear of the speedometer. From memory I believe there are two 3/8" nuts than need to be removed from the rear of the speedometer. It can then be carefully removed, albeit with a bit of puzzle-solving effort, directly out of the dash above the steering column.
EDIT - Disconnect your battery before working under the dash!
Once out, the chrome bezel ring needs to be removed by twisting it off of the face of the speedometer. The perimeter of the chrome ring has a 'dimple' in the back of it that has to be rotated to an opening for the dimple in the front perimeter surface of the speedo body. Once these are lined up the chrome ring can be removed and the several layers of the speedo face can be accessed. Note that the chrome ring fits very securely and it may take more than a bit of umphhh to break it loose and rotate it.
WARNING: Be careful not to allow any of the speedo face layers/pieces to drop out. And also, if you should choose to clean the inside and/or outside surface of the inner glass which contains the white stenciled numbers on both front and back of the glass (to produce the 3D effect) be careful not to touch the numbers or rub them with any liquid as they will wipe off very easily and then you are $100 into a new piece of stenciled glass. This is very good information I received from this forum when I was into this earlier.
Once it is apart, it should be fairly intuitive how the inner and outer glass pieces fit and should be aligned, as well as the positioning/locating 'finger' in the perimeter of the brass background piece with the graduation lines. You should be able to make the necessary corrections and rotate the chrome ring back on with the parts in their correct orientation.
It appears from the picture that whomever opened your speedometer previously (assuming it was opened) did not set the inner glass with the stenciled numbers in the correct orientation when reassembling, or did set it correctly at the time but did not ensure the inner glass piece was properly secured in the boss insert it is supposed to be set in and it has vibrated clockwise over time. The inner glass piece is not round but has flats on each side than fit into recessed areas on each side of the chrome ring. From the lack of 'blossoming' of the numbers either this is a remarkably pristine original or someone has replaced it over the years.
Another note to be aware of - after years in its original orientation, if the speedometer was never rebuilt and/or saw a lot of sun/light, many times the brown ring under the numbers may have a 'shadow' or impression of the numbers in the paint under the numbers. Be careful to reorient the ring, if this impression is evident, in the proper orientation so that they are not visible anywhere other than under the numbers they correspond to. I could not tell from the photo if you have this to consider or not.
Btw - I have the same speedometer with the exception that mine is an early '47 (pre-April '47, date code of late December '46) and accordingly has the trip odometer.
Hope this helps -
Steve
This message was edited by len47merc on 5-27-15 @ 8:25 AM
|
|
BIGTERR |
|
05-27-2015 @ 3:44 PM
|
|
|
|
Member
Posts: 28
Joined: Aug 2012
|
Thanks Steve for your very comprehensive answer to my problem. I shall follow your instructions. One question I see only 1 3/8 bolt on the back, however there are some screws that seem to be holding the speedo in place, I assume these come out as well.
Again thanks for all your help.
Terry
|
|
len47merc |
|
05-27-2015 @ 5:26 PM
|
|
|
|
Senior
Posts: 1165
Joined: Oct 2013
|
I just crawled under my '47's dash - there are only two threaded rods about 1" long that are attached to the dash and project toward the front of the car onto which the speedometer is mounted and then 2 each 3/8" lock washers and nuts are used to hold the speedo in place. Looking at the REAR of the speedo these rods/nuts are located at ~7 o'clock and ~1 o'clock on a clock dial. These are really hard to see (for me) without burying your head against the pedals and straining to lift your head up to look with one eye through progressive lenses to catch sight of them. My head typically has to be in contact with the underside of the dash to see them and usually with only one eye - try a small mirror your first go if necessary. I do not see nor recall any bolts involved - only these two nuts - for securing the speedo. Two ears at ~11 o'clock and ~5 o'clock (again viewing from the rear) are also part of the speedo which serve simply as position holds against the inside of the dash. My speedo has a light at the top and at the bottom, as well as the speedometer cable and trip odometer reset cable (the latter you should not have).
If you've big hands this will be even more challenging for you to remove everything from the rear before extraction but it can be done. You of course will have to push the speedo toward the front of the car after the nut removal to clear the threaded rods, then cant the speedo sideways to remove it through the opening (this is the puzzle part - it may take several trial and error attempts). Be careful not to use force in pulling it through the plastic shroud - it will slide out easily if oriented correctly. Btw - I used an 1/4" ratchet drive and 8" extension to facilitate the 3/8" nut removal. Try to use something (e.g., a dot of tacky grease in the socket) that will hold the nut after it clears the rod - I only dropped and had to find the nuts &/or lock washers a half dozen or so times the first time the speedo was removed - lovely when you have struggled to get into position on the floorboard wedged between the door opening and the seat or along the length of the floorboard and they fall underneath you. I shy away from using anything magnetic around the gauges and clock - likely overkill but I feel better about it.
And DON'T FORGET TO DISCONNECT THE BATTERY BEFOREHAND! Amazing how many sparks can fly and how quickly a voltage regulator can fail when big hands knock the wrong (hot) wire(s) loose or your rogue tools make the wrong connections. The cable from the channel selector foot switch for the Adjust-O-Matic radio can be particularly exciting. As Alan says "...ask me how I know..." (please don't).
Steve
This message was edited by len47merc on 5-27-15 @ 6:07 PM
|
|
BIGTERR |
|
06-01-2015 @ 12:53 PM
|
|
|
|
Member
Posts: 28
Joined: Aug 2012
|
Thanks again Steve for all your help. By the way my Merc. Is a early model as well, I have the long ss trim on the hood and no Mercury emblem on the hood. One more problem I have is the hood barely stays up, if a wind hits the car the hood comes down on its own.
Is there a fix for this, I have heard that new springs doesn't solve the problem because the longer hood is just too heavy for the standard Ford springs the factory used. Just wondered if you had the same problem, being yours is an early model as well.
By the way do you have the coupe or a sedan?
Terry
|
|
len47merc |
|
06-01-2015 @ 2:19 PM
|
|
|
|
Senior
Posts: 1165
Joined: Oct 2013
|
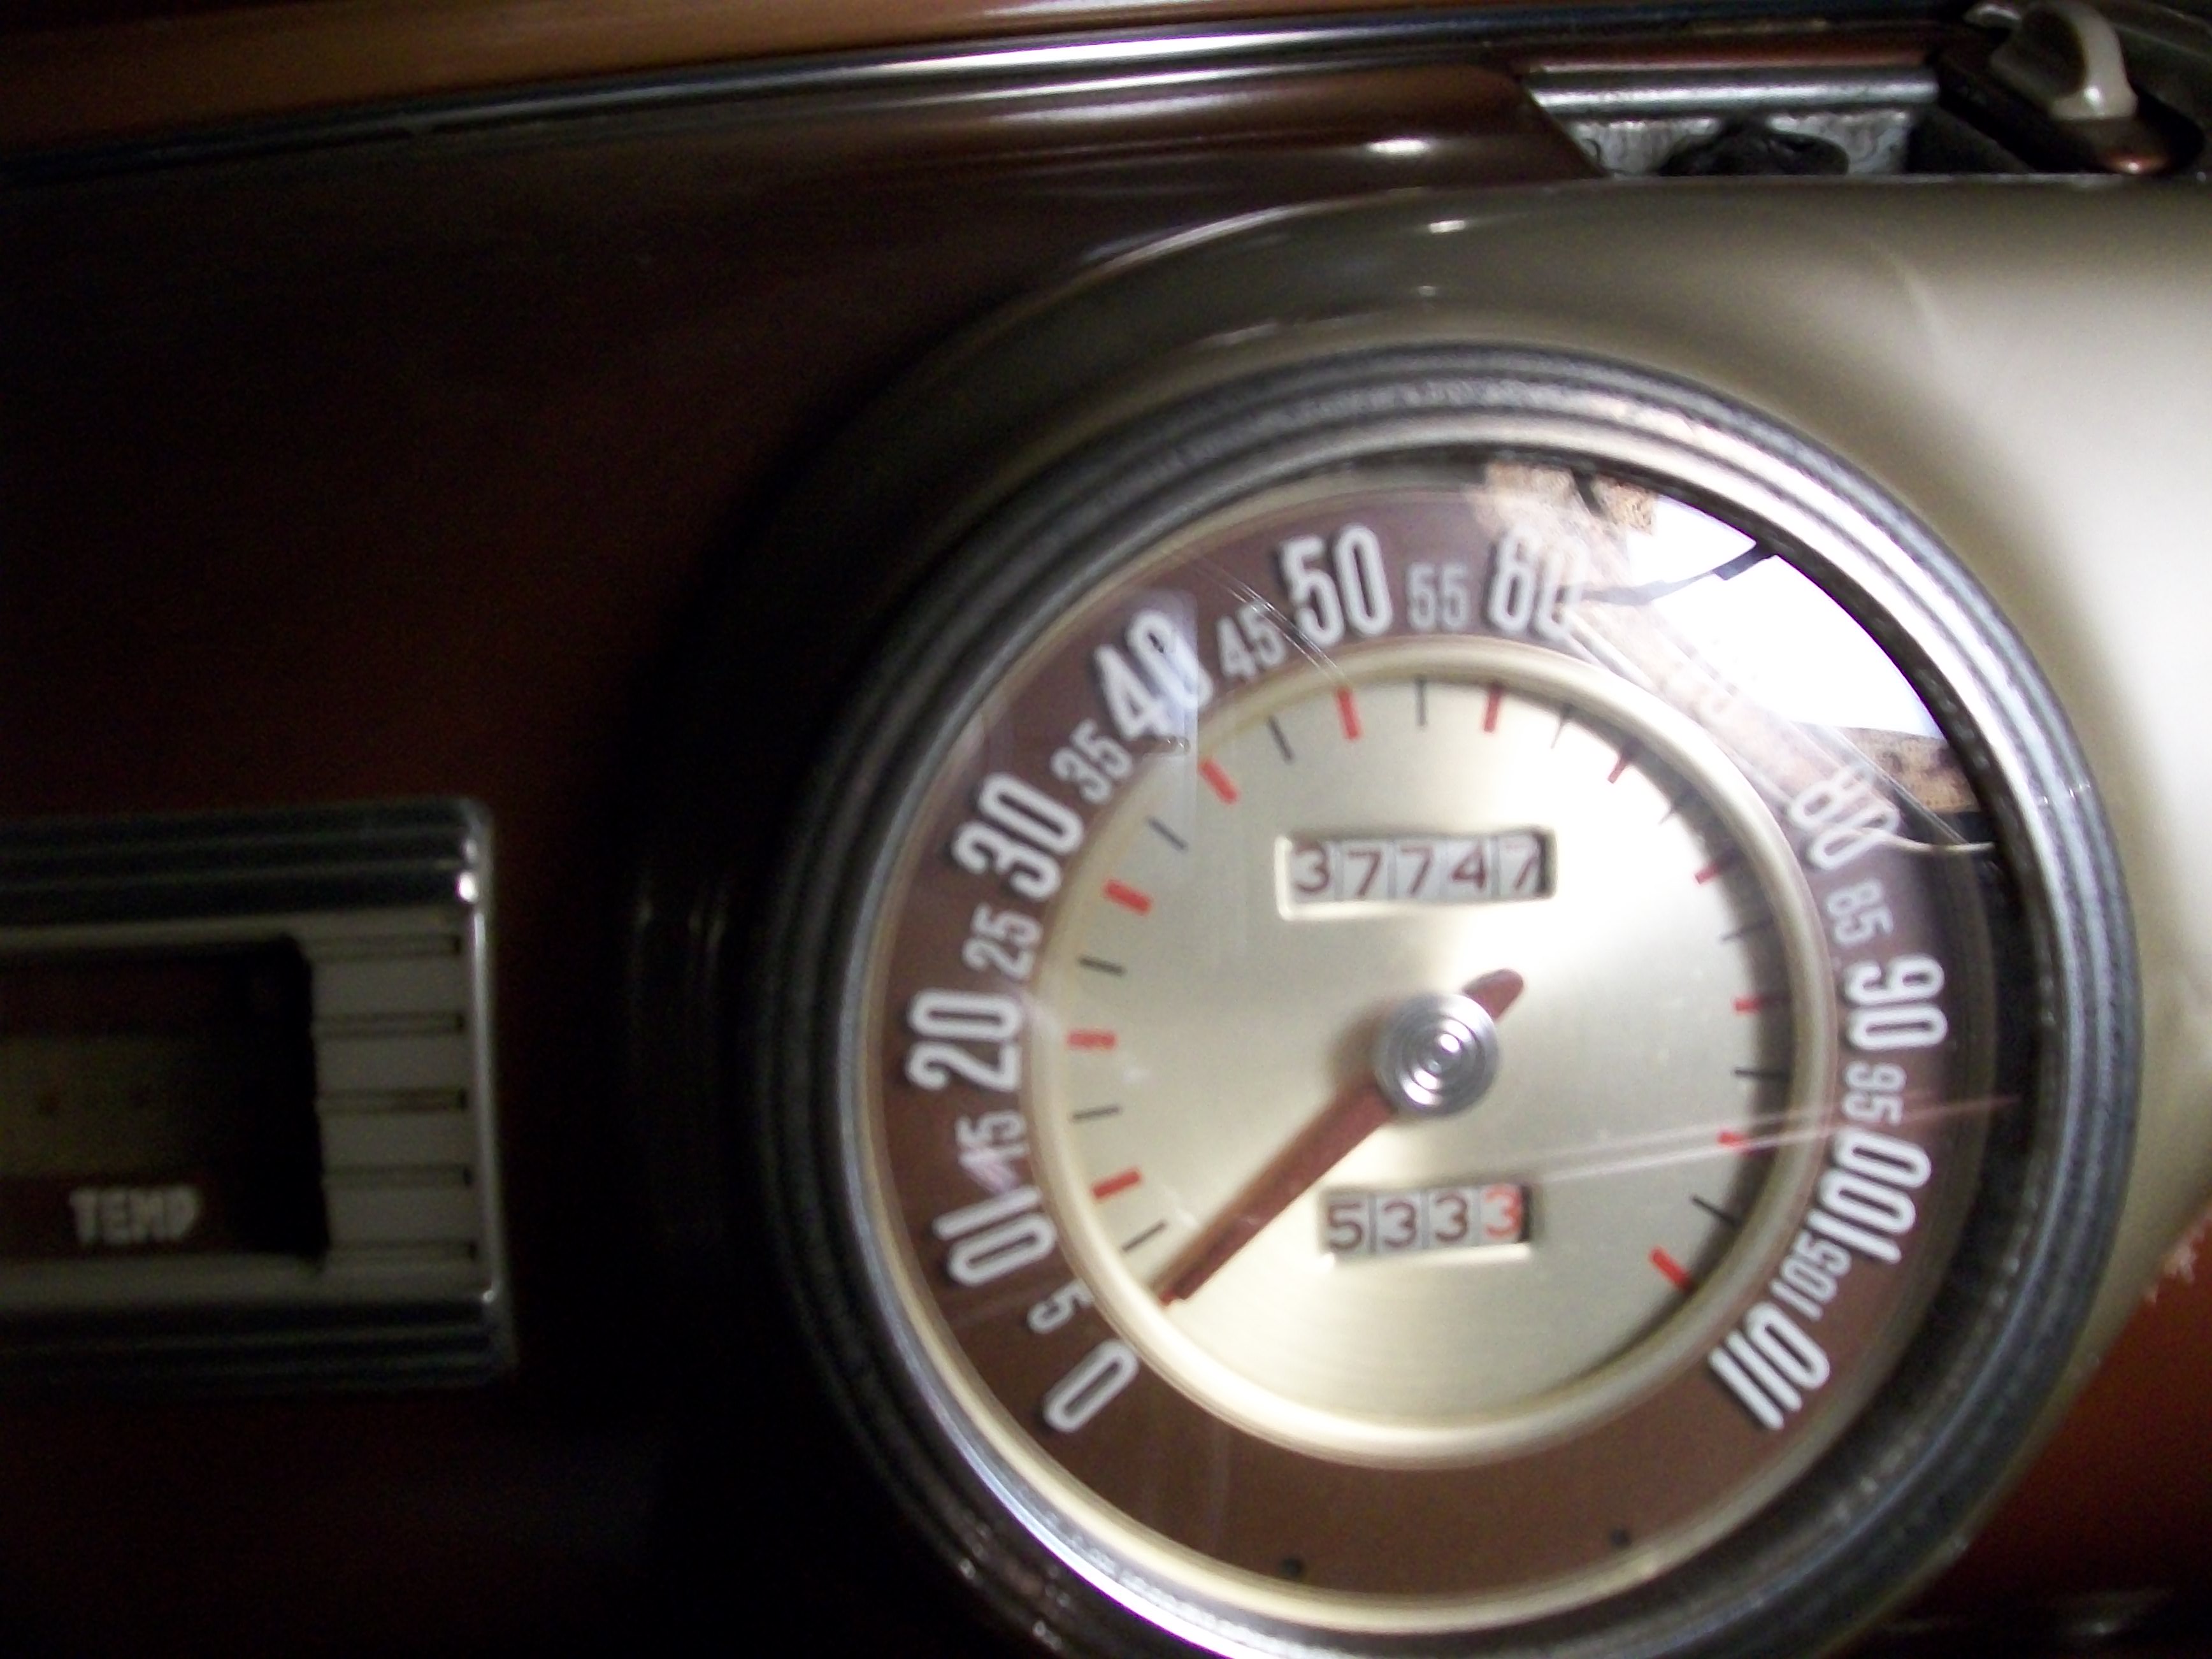
Terry - I'll attach a quick pick of my odometer taken by the previous owner as part of my pre-purchase assessment in 2013. Poor quality pic with a bit of obscuring reflection but you get the idea. I would provide you a current pic but this pic shows the original, untouched and unopened odometer before it was removed during restoration to break it free and get it functioning again. It looks identical from the outside now excepting for all the layers of lens glass are clean now and the chrome perimeter has been dusted and lightly cleaned. My '47 has the long SS trim and most all other attributes of the '46s, including the trip odometer on the speedo - I wonder if somehow your speedometer was changed at some point and the cable and knurled knob for the trip odometer are still under your dash - ? If it is there you will find it under the dash on the left side of the steering column and right of the throttle control, pointing downward at your knee. Most early '47s had trip odometers based on my EFV8 documentation and other research, but yours could have been part of the phase-in process like mine. One anomaly of mine that falls into this category is it was, according to a bit of research by the EFV8 technical adviser, one of a handful of early '47s that received the post-April chrome grill perimeter at the Rouge - can't wait to explain this one to the judges.
On the hood - am using the original hinges, springs, wire nuts and wires (latter believe it or not) still and the hood stays up well though not all the way to the end of the hinge travel. In the past if I was going to be under it for a while I'd either remove it completely or place an appropriately cut 2"x2" under the hood and on top of the closing mechanism to hold it up a bit higher to the max possible opening. I have no experience with or knowledge of how to correct your issue but I have worked on my '47 and other '46s and '47s and have yet to experience the problem you are describing. My gut tells me it's worth a shot at a new set (or another set) of springs as well as a bit of adjusting/tightening trial-and-error on the hinge mechanism bolts before accepting this long term. Tough on the head...
May just be an adjustment issue - perhaps others can weigh in - ?
Btw - are you coming to Charlotte next week for the Eastern?
Steve
This message was edited by len47merc on 6-1-15 @ 2:49 PM
|
|
TomO |
|
06-02-2015 @ 5:57 AM
|
|
|
|
Senior
Posts: 7243
Joined: Oct 2009
|
The hood support arm pivots wear and affect the geometry of the supports and they will no longer support the hood in the open position. Replacing the springs does not fix the problem, you have to replace or repair the arms.
Bob Drake makes a reproduction that he says is superior to the original design. Some people claim that they do not work. I have no experience with them, so I cannot recommend them. Bill Large or Rusty Davis may have some recommendations on these.
The same problem exists for the trunk support arms.
I would remove the front seat before working under the dash. It saves the upholstery and your back. Get a couple of pillows for support and to lessen the pain of the pedals on your head, neck and back.
BTW last time that I did this on my 40, I found a 1922 silver dollar.
Tom
This message was edited by TomO on 6-2-15 @ 6:03 AM
|
 Reply to Discussion
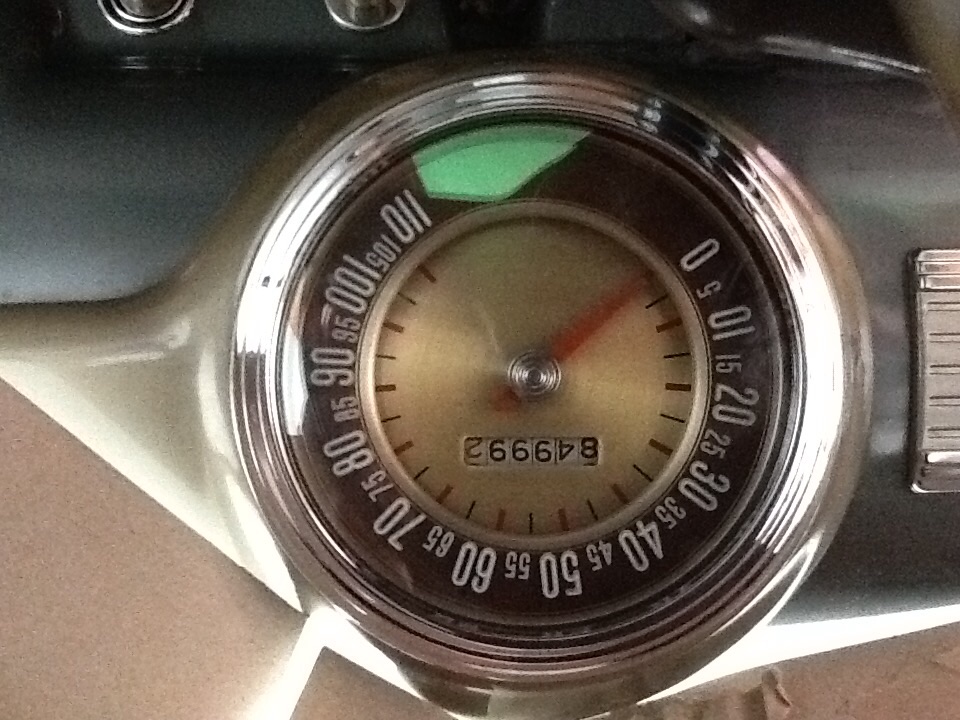